There’s something so special about a dessert that feels decadent and effortless. Whether you’re celebrating Mother’s Day, planning a sweet surprise “just because,” or simply craving something nostalgic and creamy, this no-bake Oreo icebox cake is the perfect treat.
Thank you for reading this post, don’t forget to subscribe!It’s one of those crowd-pleasers that feels fancy, but takes almost no time or oven space—ideal for warm spring days, last-minute gatherings, or memory-making afternoons with the kids. With just a few simple ingredients and a little layering magic, you’ll whip up a dreamy dessert that looks as lovely as it tastes.
So grab your apron, a mixing bowl, and maybe a helper or two (little hands love helping with this one). Let’s get started!
1. Gather Your Ingredients and Tools
Before you begin, make sure everything you need is on hand. This recipe doesn’t require fancy equipment, but having it all prepped makes the process smooth and joyful.
Step-by-Step
- Oreo Cookies – One standard package (about 36 cookies)
- Heavy Whipping Cream – 3 cups (cold)
- Powdered Sugar – ½ cup
- Vanilla Extract – 1 tsp
- Cream Cheese – 8 oz, softened (optional for a tangy twist)
- Glass Dish or Loaf Pan – 8×8 or 9×9-inch works beautifully
- Mixer – hand or stand
- Rubber spatula
- Piping bag or zip-top bag (optional) for fancy topping
Tip: Want to make it extra special for Mother’s Day? Pick up a few edible flowers, raspberries, or mint sprigs for garnish.
Picture This
A cozy kitchen filled with sunlight, a cheerful countertop lined with whipped cream clouds and crinkly Oreo wrappers, and the promise of a chilled, chocolatey masterpiece by evening.
2. Make the Dreamy Whipped Cream
This isn’t just any whipped cream—it’s the silky, fluffy heart of your no-bake Oreo cake. Sweet, light, and rich, it perfectly balances the crunch and cocoa of the cookies.
Step-by-Step
- In a large mixing bowl, pour in the cold heavy cream.
- Add powdered sugar and vanilla extract.
- Beat on high speed for about 3–4 minutes until soft peaks form.
- For a tangy twist, add softened cream cheese and whip for another minute until smooth.
This creamy filling holds the cake together without being too sweet or heavy.
Picture This
Billowy peaks of homemade whipped cream swirl in the bowl, thick and glossy. You swipe a finger through for a taste—sweet, creamy, and just the right amount of indulgence.
3. Layer the Oreos and Cream
Now comes the fun part: layering your Oreo icebox cake into something beautiful and bakery-worthy.
Step-by-Step
- Spread a thin layer of whipped cream on the bottom of your glass dish to anchor the first cookies.
- Arrange a single layer of Oreos (you can slightly overlap or break some to fit corners).
- Spoon a generous layer of whipped cream over the cookies and gently spread to cover.
- Repeat: Oreos, cream, Oreos, cream—until you reach the top. End with a thick final layer of cream.
Optional: Crush a few Oreos and sprinkle over the top layer for texture and flair.
Picture This
Each layer adds height and anticipation—velvety white cream nestled between deep chocolate rounds, like a cozy dessert lasagna. You can already imagine the perfect forkful, rich with contrast and cool sweetness.
4. Chill (and Let the Magic Happen)
Patience is the secret ingredient here. The chilling time transforms your dessert from layers into one cohesive, sliceable dream.
Step-by-Step
- Cover your dish with plastic wrap or a lid.
- Refrigerate for at least 6 hours—overnight is even better!
- This resting time allows the Oreos to soften and absorb the cream, creating a cake-like texture.
Pro Tip: If you’re short on time, pop it in the freezer for 1–2 hours to firm it up faster—but chilling longer gives the best results.
Picture This
Your cake rests in the fridge, the layers gently melding together like old friends at a garden party. You open the door later to find a cool, cloud-soft dessert ready to dazzle.
5. Garnish Like a Pro
Now it’s time to add those final touches that turn your Oreo icebox cake into a showstopper.
Step-by-Step
- Scoop the remaining whipped cream into a piping bag or zip-top bag and pipe rosettes around the edges.
- Sprinkle with crushed Oreos, chocolate shavings, or mini chocolate chips.
- Top with fresh raspberries or edible flowers for a Mother’s Day flair.
- Add a mint leaf for color and contrast.
Optional: Lightly dust with powdered sugar for that “just snowed” look.
Picture This
A chilled, dreamy cake garnished with love—chocolate curls, ruby-red berries, and delicate cream swirls. It’s almost too pretty to eat. Almost.
6. Slice, Serve, and Celebrate
The moment of truth! This dessert not only looks stunning on a table—it slices beautifully and feeds a crowd with joy.
Step-by-Step
- Use a sharp knife to slice gently through the layers.
- Wipe the knife between cuts for clean slices.
- Serve chilled with coffee, tea, or a sparkling beverage.
Whether it’s Mother’s Day, a birthday, or a regular Tuesday, this cake delivers big smiles with minimal effort.
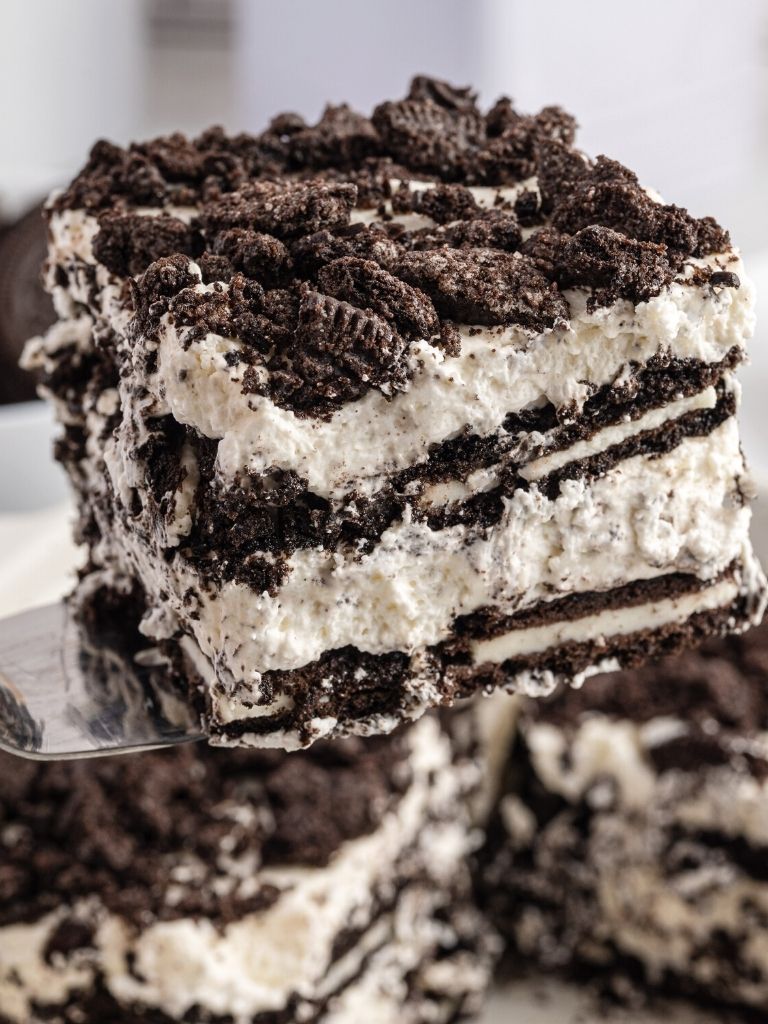
Picture This
The first slice lifts easily—cookies soft but intact, cream thick and luscious. Your guests’ eyes light up. One bite in, and the room is filled with happy hums and second-helping requests.
Celebrate Sweet Moments with This Easy Oreo Icebox Cake
Life’s sweetest moments are often the simplest—a quiet afternoon, laughter in the kitchen, a forkful of something homemade. This no-bake Oreo icebox cake is more than a dessert. It’s a memory in the making.
Perfect for Mother’s Day, anniversaries, brunches, or those magical “just because” moments, it’s a reminder that joy doesn’t have to be complicated. With a handful of ingredients and a little layering love, you can create something truly special—no oven required.