Well, Hey There, Sugar!
Come on in and grab yourself a sweet tea—I’m Granny B, and I’m fixin’ to show y’all how to take that dusty ol’ pallet leanin’ against the shed and turn it into the prettiest little garden trellis this side of the Mason-Dixon. Whether you’re growin’ sugar snap peas, morning glories, or just wanna gussy up your garden, this DIY project is cheap, cheerful, and oozin’ with Southern charm. Let’s get to beautifyin’, shall we?
Thank you for reading this post, don’t forget to subscribe!Supplies Needed
Here’s what you’ll need to whip up your darling pallet trellis:
- 1 standard wooden pallet (heat-treated, not chemically—check for “HT” stamp)
- Sandpaper (medium and fine grit)
- Exterior wood stain or paint (color of your choice)
- Paintbrush or sponge brush
- Wood sealer (optional but helpful for weatherproofin’)
- L-brackets or garden stakes (for anchoring)
- Chicken wire or garden netting (optional for extra support)
- Zip ties, wire, or staples (for attaching netting)
- Decorative extras: faux flowers, twine, hand-painted signs, or vintage knobs
Tools Needed
- Power drill or screwdriver
- Hammer
- Staple gun
- Measuring tape
- Gloves (splinters don’t make for good company)
- Drop cloth or newspaper (to keep things tidy)
Step-by-Step Instructions
Step 1: Pick Your Pallet, Baby
Sassy Tip: “Now don’t just grab any ol’ plank of wood—make sure that pallet is heat-treated and in decent shape. We want rustic, not rotten!”
Picture This: A Southern lady (maybe Granny B!) inspecting a stack of wooden pallets in her backyard with a sweet tea in hand and a sunhat on her head.

Step 2: Sand It Like You Mean It
Sassy Tip: “Give that pallet a good scrub-down with sandpaper, darlin’. We’re refinishing, not refinishing our fingernails with splinters!”
Picture This: Hands sanding down the pallet on a drop cloth, sunlight streaming through garden blooms nearby.

Step 3: Paint or Stain with Pizzazz
Sassy Tip: “Now this is your moment to shine! Choose a color that sings to your soul—or just matches your begonias!”
Picture This: A paintbrush mid-stroke across slats, the pallet turning a soft mint green or honey-stained hue, with floral pots in the background.

Step 4: Add Your Climber Support
Sassy Tip: “Honey, those vines need somethin’ to cling to—just like me at a family reunion when the sweet tea runs out!”
Attach chicken wire or garden netting to the back of the pallet using a staple gun.
Picture This: Close-up of hands securing garden wire to the back of the painted pallet, with a basket of tools and flowers nearby.

Step 5: Set It Up and Anchor It
Sassy Tip: “We don’t want this beauty blowin’ away in the wind like Aunt Velma’s wig at Easter service. Anchor it down, sugar!”
Use L-brackets for a fence or garden stakes to keep it steady in soil.
Picture This: A garden trellis standing proud next to raised beds, with Granny B giving it a satisfied look and thumbs-up.

Step 6: Gussy It Up! (Optional but Y’all Know I Can’t Help Myself)
Sassy Tip: “A little ribbon here, a rusty knob there, maybe even a cheeky hand-painted sign sayin’ ‘Grow, baby, grow!’—don’t be shy with the flair.”
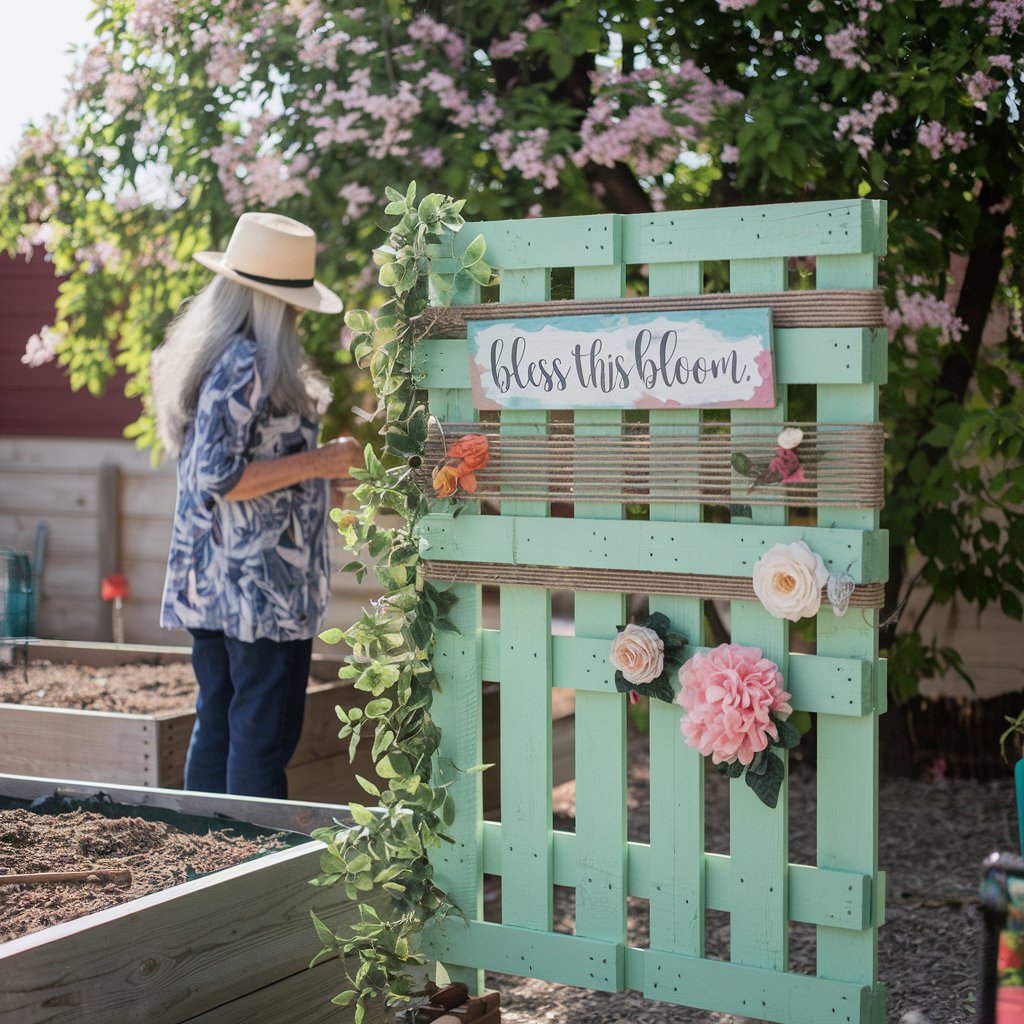
Picture This: The pallet adorned with twine, faux flowers, and a painted sign that says “Bless This Bloom.”

Finished Product
Well, would ya look at that! You’ve gone and turned a plain ol’ pallet into a garden masterpiece. Your new trellis is ready to support beans, cucumbers, clematis—or just look cute as a June bug in your backyard. It’s rustic, functional, and downright adorable—just like you, darlin’.
Picture This: A flourishing garden corner featuring the trellis with climbing vines, a gingham cushion on a nearby bench, and sunlight dappling through a crepe myrtle tree.

Love, Granny B ❤️