We’re excited to guide you through the journey of becoming a beekeeper! With your first colony of bees, you’ll be joining a community of passionate folks who love these incredible little creatures. Don’t worry if you’re feeling a bit nervous – we’ll take it step by step. Beekeeping does require some time, but it’s a rewarding hobby that’s worth it.
Key Takeaways
- Get an overview of the basics of beekeeping and what to expect.
- Learn about the importance of bees and their role in our ecosystem.
- Understand the initial setup and equipment needed for your first hive.
- Discover the joys of harvesting your first batch of honey.
- Join a community of beekeepers making a difference.
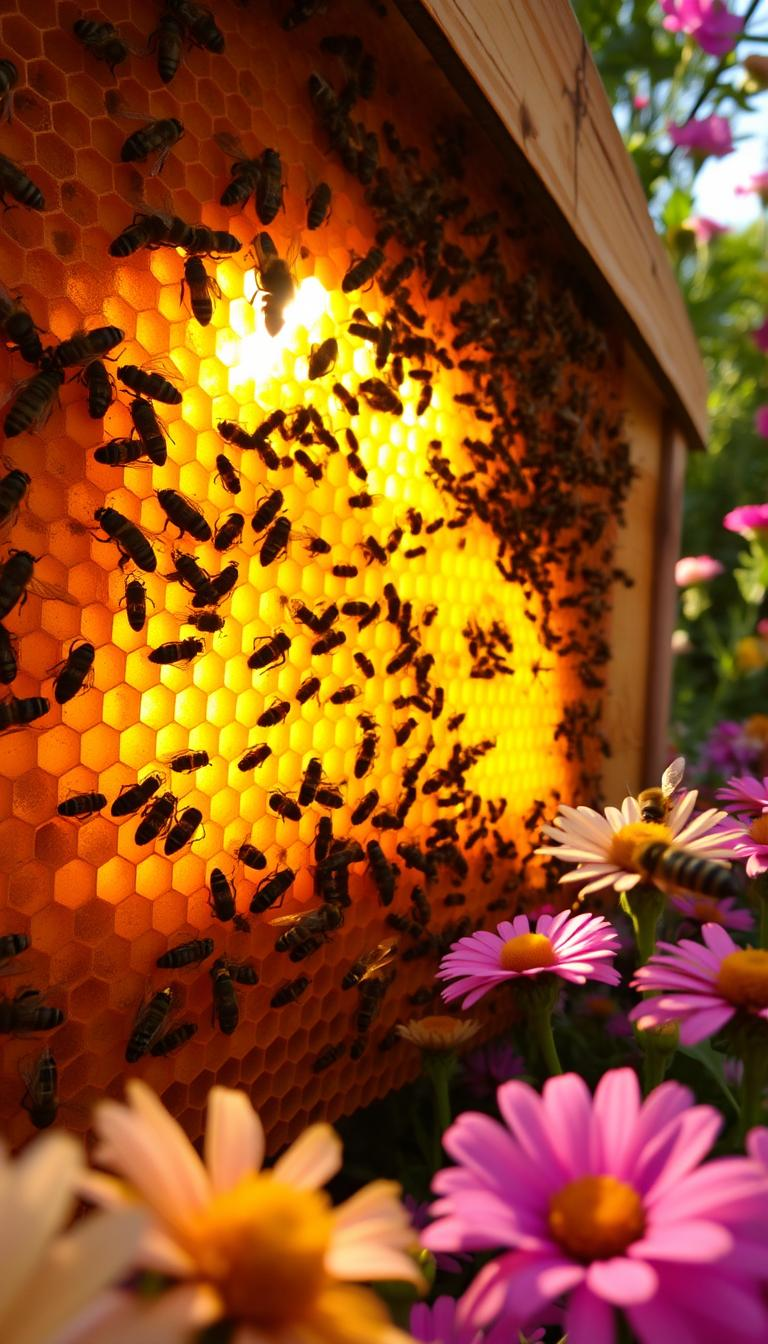
The Fascinating World of Honeybees
As we dive into the world of beekeeping, we’re immediately drawn into the fascinating realm of honeybees. These social creatures live in a highly organized colony, working together like a well-oiled machine. It’s a truly remarkable sight to behold!
Honeybees are very social creatures. They live in what we call a colony. A colony is, essentially, a family of bees. Within the colony, there is a queen bee. Every colony has just one queen and she is the mother of the bees in the hive. Her primary role is to lay eggs. She is the only female in the hive that mates and lays fertilized eggs.
Understanding the Honeybee Colony
A healthy colony consists of one queen bee, thousands of worker bees (all female), and a smaller number of male drones. The queen bee is the heart of the colony, laying up to 2,000 eggs per day during peak season. Worker bees make up the majority of the colony and are responsible for everything from collecting nectar to caring for brood (baby bees) to defending the hive.
| Role | Description | Responsibilities |
|---|---|---|
| Queen Bee | The mother of the bees in the hive | Laying eggs |
| Worker Bees | Female bees that make up the majority of the colony | Collecting nectar, caring for brood, defending the hive |
| Male Drones | Male bees with a specific role in the colony | Mating with the queen |
Understanding how a colony functions as a superorganism is key to successful beekeeping. The brood nest is the central area of the hive where the queen lays eggs and young bees develop. It’s essentially the nursery of the colony and is carefully regulated by the workers.
As we explore the world of honeybees, we begin to appreciate the intricate social structure and cooperation within the colony. It’s a truly fascinating world, full of wonder and complexity.
Why Start Beekeeping?
Beekeeping has become a beloved hobby for many, and for good reason – the benefits are as sweet as the honey produced. As we delve into the world of beekeeping, it’s clear that the rewards extend far beyond the hive.
One of the most compelling reasons to start beekeeping is the production of pure, raw honey. A single colony can produce between 30-60 pounds of surplus honey in a good year, which is not only a delight for your taste buds but also a potential source of income. The market for high-quality, wildflower honey is always in demand, making it a valuable commodity for those looking to sell or barter their surplus.
Benefits of Keeping Bees
Keeping bees offers a multitude of benefits that make it an attractive hobby. For one, the pollination services provided by your bees will result in more abundant flowers and increased vegetable yields in your garden. This is a direct result of the busy work of your bees as they flit from flower to flower, collecting nectar and pollen.
- The therapeutic aspect of beekeeping is another significant advantage. The focused attention required when inspecting a hive helps clear your mind of daily stresses and connects you to nature in a profound way.
- Beekeeping also opens doors to a wonderful community of like-minded individuals. From local beekeeping associations to online forums, you’ll find mentors and friends who share your passion for beekeeping and bees.
- Many beekeepers enjoy creating value-added products like beeswax candles, soaps, and cosmetics, turning their hobby into a potential small business opportunity.
The honey production of a healthy colony is a significant benefit. On average, a colony will produce enough honey in a year for a family to use, with surplus to sell or store for later. I’ve personally experienced a colony producing a surplus of 110 pounds of honey after a fairly hard winter and an average summer, which is a testament to the potential of these incredible insects.
In conclusion, the benefits of beekeeping are multifaceted, ranging from the production of delicious honey to the therapeutic aspects of tending to your bees. Whether you’re looking to enhance your garden’s productivity, explore a new hobby, or simply enjoy the rewards of working with nature, beekeeping is an activity that can enrich your life in many ways.
Before You Begin: Important Considerations
Before diving into the world of beekeeping, it’s essential to consider a few crucial factors that’ll ensure a sweet success! While beekeeping can be a rewarding hobby, it’s not without its challenges. As we explore the important considerations, you’ll get a better understanding of what’s involved in keeping bees.
Space and Location Requirements
When it comes to beekeeping, location is everything! You’ll want to choose a spot for your hive that’s safe, accessible, and pleasant for your bees. Ideally, your apiary should be situated in an area with an abundance of flowers, especially flowering trees, to provide a constant source of nectar and pollen for your bees. A quiet, peaceful spot away from people and pets is also a must, as you wouldn’t want your bees to become a nuisance or a disturbance.
When looking for the perfect spot, consider the following: you’ll want an area that’s level or can be leveled with a palette and wood under the legs, ensuring your hive remains stable. It’s also crucial to check that your chosen location is legally permitted and far from areas that may be sprayed with pesticides, which can harm your bees. On the other hand, there are certain areas you should avoid, such as spots with bright lights, near where pets and children spend time, or close to sidewalks and high traffic areas. And, interestingly, bees are attracted to chlorinated water, so it’s best to keep your hive away from pools!
To summarize, here are some key points to consider when choosing a location for your bees:
- Lots of flowers, especially flowering trees, for nectar and pollen
- Quiet and away from people and pets
- Safe from wind and animals like bears
- Level ground or the ability to level it
- Legally permitted area
- Far from areas that may be sprayed with pesticides
Now, let’s talk about the space needed for your hive. While bees don’t require a lot of room – a 3’x5′ area per hive is sufficient – you’ll want to position them thoughtfully on your property. Consider the sunlight; morning sun and afternoon shade are ideal. Also, think about the wind direction and try to protect your hive from strong gusts. And, of course, be mindful of your neighbors; while many are supportive of beekeeping, some might have concerns, especially if they have small children or allergies.
Before setting up your hive, it’s also important to check your local regulations. Many cities and HOAs have specific rules about beekeeping, including limits on the number of colonies you can keep and required distances from property lines. Being a responsible beekeeper means being aware of and adhering to these regulations.
Lastly, be honest with yourself about the time commitment involved in beekeeping. While it doesn’t demand daily attention, regular inspections during the active season and occasional heavy lifting when harvesting honey or moving equipment are part of the job. If you’re short on space or regulations are restrictive, don’t worry! Many beekeepers find alternative locations for their hives, such as friends’ properties, community gardens, or local farms.
Finding the Perfect Location for Your Hives
When it comes to beekeeping, the location of your hives is just as important as the bees themselves! The right spot can make all the difference in the health, happiness, and productivity of your bees. So, what makes a great location for your hives?
First and foremost, your bees love sunshine! Placing your hive in a sunny location with morning sun is ideal, as it gets them up and active early. If you live in an especially hot area, they’ll appreciate some afternoon shade to keep them cool during the hottest months. While hives can do okay in the shade, they’re much more productive when they have plenty of sunlight.
Ideal Hive Placement Factors
So, what are the key factors to consider when choosing a location for your hive? Let’s break it down:
- Finding the perfect spot for your hives is like choosing real estate – it’s all about location, location, location! The right placement can make a world of difference in how your bees thrive.
- Your bees will be happiest with morning sunshine that gets them up and active early, with some afternoon shade during the hottest months – especially important in our southern states where temperatures can soar!
- Access to water is essential for your bees – they use it for cooling the hive and processing honey. If there’s no natural water source nearby (like a pond or stream), you’ll need to provide one, like a shallow bird bath with stones for them to land on.
- Consider the flight path of your bees – they typically fly out of the hive entrance in a straight line before dispersing, so position hives so this flight path doesn’t cross walkways or areas where people gather.
- A bit of elevation helps with hive ventilation and keeps the bottom board dry during rainy periods – simple concrete blocks work perfectly for raising hives about 6-8 inches off the ground.
- Protection from strong winds is important, especially in winter – a fence, shrubs, or building that blocks prevailing winds can help your colony conserve energy during cold months.
- Think about your own convenience too – you’ll be visiting these hives regularly with equipment in tow, so ensure the area is easily accessible for you (not up a steep hill or through thick brush!).
By considering these factors, you can create a welcoming environment for your bees to thrive, with a good nectar flow and overall health. Happy beekeeping!
Essential Beginner Beekeeping Basics
As you start your beekeeping journey, you’ll quickly realize that understanding the language of beekeeping is just as important as setting up your hive. The world of beekeeping is rich with its own terminology, and getting familiar with these terms will make your experience smoother and more enjoyable.
Understanding Beekeeping Terminology
Let’s dive into the essential terms you need to know. Beekeeping has a unique vocabulary, and understanding these basics will help you communicate effectively with other beekeepers and manage your bees with confidence.
First off, let’s talk about the brood. This term refers to the immature stages of bees – eggs, larvae, and pupae – that haven’t yet emerged from their cells. The brood is housed in the brood chamber or brood nest, typically located in the lower boxes of the hive. The queen, the heart of your colony, is the only fertile female and lays all the eggs. Spotting her during inspections is a thrill for any beekeeper, and she’s usually marked with a dot of paint to make her easier to find.
When beekeepers discuss “drawing out comb,” they’re referring to the process where bees build honeycomb on foundation – those sheets of wax or plastic with hexagonal patterns that guide the bees. You’ll also hear about honey supers, which are the boxes placed above the brood chamber where bees store excess honey that you’ll eventually harvest. The term “super” simply means “above,” indicating their position relative to the brood chamber.
- Bee brush: A soft brush used to gently remove bees from frames.
- Beehive: A box or receptacle with movable frames, housing a colony of bees.
- Bee space: A specific gap (5/16 to 3/8 inch) that allows bees to move freely without encouraging comb building or propolizing.
- Bee suit and bee veil: Protective gear for beekeepers to prevent stings and keep clothes clean.
Another crucial term is propolis, a sticky substance bees collect from trees to seal gaps in the hive. It’s akin to their version of caulk and boasts antimicrobial properties. Understanding the difference between a swarm (the natural reproduction of a colony) and absconding (when bees abandon a hive due to poor conditions) will help you diagnose issues with your bees.
By mastering these beekeeping basics and terminology, you’ll be well on your way to becoming a confident beekeeper. Remember, the key to successful beekeeping lies in understanding your bees and their needs.
Beekeeping Equipment: What You’ll Need to Start
Getting started with beekeeping requires some essential equipment, but don’t worry, it’s easier than you think! Let’s dive into what you’ll need to begin your beekeeping journey.

To get started, you’ll need to familiarize yourself with the basic parts of the beehive and some of the beekeeper’s terminology. The standard Langstroth hive is what most beginners start with, and for good reason – it’s designed with removable frames that make inspecting your colony and harvesting honey much easier.
The Langstroth Hive Components
Your basic hive setup will include several key components. First, there’s the bottom board, which serves as the floor of the hive. Then, you have deep boxes for the brood chamber where your bees will live and breed. On top of these, you may add shallower boxes, known as supers, for honey collection.
Inside these boxes, you’ll hang frames that are typically equipped with foundation sheets. These sheets guide the bees in building comb and help you manage the hive more effectively. Finally, you’ll need a telescoping cover to protect the hive from the elements.
In addition to the hive itself, you’ll need some personal protective equipment. At a minimum, this includes a veil to protect your face and head. Many beginners also prefer a full jacket or suit with an attached veil and gloves for extra protection.
Essential tools for beekeeping include a smoker to calm the bees during inspections, a hive tool to pry apart boxes and frames, and a bee brush to gently move bees aside when needed. For feeding your bees, you’ll want some type of feeder, with options including entrance feeders, division board feeders, or top feeders.
Many beekeeping suppliers offer beginner kits that include most of what you need to get started. These kits can be a great value and ensure you have compatible equipment from the start. Don’t forget to also prepare for your eventual honey harvest with food-grade buckets, jars, and an uncapping knife.
Choosing the Right Bee Hive Type
As you embark on your beekeeping journey, one of the most crucial decisions you’ll make is selecting the right hive type for your bees. This decision will impact your beekeeping experience, and it’s essential to get it right from the start.
There are several hive types to choose from, each with its unique characteristics, advantages, and challenges. As a beginner, it’s natural to feel overwhelmed by the options. However, by understanding the different hive types, you can make an informed decision that suits your needs and preferences.
Langstroth Hives: The Standard Option
Langstroth hives are the most common type of hive in North America, and for good reason. They feature stackable boxes with hanging frames that allow for easy inspection and honey harvesting, making them ideal for beginners. I strongly suggest starting with two deep Langstroth brood chambers to establish the brood chamber, and later adding “medium” honey supers over a queen excluder.
One of the significant advantages of Langstroth hives is their standardized system. You’ll use “deep” boxes for the brood chamber where the queen lays eggs, and shallower “medium” or “shallow” boxes (called supers) for honey collection. This makes finding equipment and advice much easier, as most beekeepers are familiar with the Langstroth system.
For instance, using Langstroth hives allows you to easily manage your bees and harvest honey. As “the Langstroth hive has truly stood the test of time (since the mid-1800s) and is by far the easiest way to learn to keep bees.” This is because the design has been refined over the years, making it a reliable choice for beekeepers.
However, it’s essential to consider your physical abilities when choosing a hive type. Standard Langstroth boxes full of honey can weigh 50+ pounds, so if lifting is a concern, you may want to look into 8-frame equipment, which is lighter than the standard 10-frame. Alternatively, you could consider a horizontal hive design.
Other hive types, such as Top bar hives, Warre hives, and Flow Hives, offer unique benefits and challenges. Top bar hives, for example, feature a single horizontal box with bars across the top from which bees build natural comb downward. They’re gentler on your back, as there’s no heavy lifting involved, but can be trickier for honey extraction.
Warre hives are designed to mimic the natural habitat of bees with minimal intervention. They’re beautiful and more “hands-off,” but can be challenging for beginners who need to regularly inspect their colonies. Flow Hives, on the other hand, have innovative frames that allow honey to be drained directly from the hive, making harvesting more convenient.
Ultimately, the choice of hive type depends on your specific needs, preferences, and circumstances. As a beginner, it’s recommended to start with a tried and true system like Langstroth hives, and then experiment with other types once you’ve gained more experience.
Obtaining Your First Bees

The moment of truth has finally arrived – it’s time to get your first bees! This is an exciting milestone in your beekeeping journey, and we’re here to guide you through the process. You’ve got your hive ready, and now it’s time to bring home your new buzzing friends.
There are several ways to obtain your first colony, and each has its advantages depending on your situation and comfort level. The two most common methods are purchasing package bees or a nucleus colony (nuc).
Package Bees vs. Nucleus Colonies
Let’s dive into the details of package bees and nucleus colonies to help you decide which is best for you. Package bees are the most common way for beginners to start. They contain about 3 pounds of worker bees (roughly 10,000 bees) with a separately caged queen that they’ll need to accept over time.
When you order package bees, they arrive in a screened box with a can of syrup to feed them during transport. It’s quite the experience picking them up from the post office or supplier! The cage is designed to keep the queen safe until she’s released into the hive.
On the other hand, a nucleus colony (or “nuc”) is a small, functioning colony with 4-5 frames of bees, brood in various stages, and an established queen that’s already been accepted by the workers. Think of it as a “starter colony.”
Nucs give you a significant head start compared to packages since the queen is already laying eggs and the colony is already functioning as a unit. They’re more expensive, but often worth it for beginners who want to see quicker results.
When deciding between package bees and a nuc, consider your budget and how quickly you want your colony to establish itself. If you’re looking for a more affordable option and don’t mind waiting a bit longer for your colony to grow, package bees might be the way to go. However, if you’re willing to invest a bit more for a head start, a nuc could be your best bet.
Regardless of which option you choose, it’s crucial to contact a local apiary to order your bees. Local bee suppliers are your best bet because they’ll provide bees adapted to your climate and can often offer advice specific to your region.
When ordering, consider requesting a marked queen (one with a dot of paint on her thorax). This makes finding her during inspections so much easier, especially for beginners still training their eyes to spot her.
Timing is everything – be sure to order your bees well in advance (often by January or February) for spring delivery, as suppliers frequently sell out of both packages and nucs.
Installing Your Bees: Step-by-Step Guide
The moment of installing your bees is both exciting and a bit nerve-wracking, but don’t worry, it’s easier than you think! Let’s walk through the process together, step by step, to ensure you’re fully prepared for this significant moment in your beekeeping journey.
Preparing Your Hive for Installation
Before your bees arrive, make sure your hive is completely set up and ready. This includes having the bottom board in place, the brood box with frames installed, and both inner and outer covers ready. You’ll also want to prepare a feeder with sugar syrup (1:1 ratio of sugar to water). Having only five or six frames with foundation in the hive body is recommended, with the remaining frames alongside, ready to be used.
Once you get your package of bees home, give them some sugar syrup right away. They’ve likely exhausted their supply from their postal journey and will need nourishment. To make the syrup, simply mix two cups of sugar with one cup of boiling water. Let it cool, then use a small paintbrush to paint it onto the wire sides of the cage. This not only feeds them but also helps to calm the bees down.
It’s best to install your bees in the late afternoon or evening when they’re less likely to fly away. If you need to delay the installation, you can keep the package in a cool, dark place until then.
For package installation, start by spraying the package lightly with sugar water to keep the bees occupied. Then, carefully remove the queen cage from the package, remove the cork from one end (leaving the candy plug intact), and place it between frames in the center of your hive. After securing the queen cage, you’ll shake the bees from the package into the hive. With a nucleus colony, installation is simpler; you’ll just transfer the frames from the nuc box to your hive in the same order, being careful not to crush any bees.
| Installation Steps | Package Installation | Nucleus Colony Installation |
|---|---|---|
| 1. Prepare Hive | Spray package with sugar water | Transfer frames directly |
| 2. Feed Bees | Remove queen cage, place between frames | Ensure queen is present and healthy |
| 3. Install Bees | Shake bees into hive | Place frames in hive, same order |
After installation, place the inner and outer covers on the hive, reduce the entrance to prevent robbing, and leave the colony alone for at least 3-5 days to settle in. Your first inspection is crucial; you’ll check if the queen has been released from her cage and look for evidence she’s laying eggs, indicating successful establishment of the colony.
By following these steps, you’ll be well on your way to establishing a thriving colony. Remember, patience and attention to detail are key to successful beekeeping.
Proper Hive Inspection Techniques
Mastering the art of hive inspection is crucial for any beekeeper, ensuring the health and productivity of their bees. It’s a skill that requires patience, attention to detail, and a gentle touch to avoid disturbing your busy bees. To get the most out of your inspections, it’s essential to understand when and how to inspect your hive.
When and How Often to Inspect
During the active season, which typically spans from spring through fall, plan to inspect your hive every 7-10 days. This regular schedule helps you catch potential problems early while minimizing disruption to the colony. Choose a good day for inspections – aim for mid-morning on a warm, sunny day when many forager bees are out collecting nectar and pollen, leaving fewer bees in the hive to manage.
Before opening the hive, take a moment to observe the entrance activity. Are bees coming and going normally? Do you see pollen being brought in, a sign of brood rearing? Any fighting at the entrance could indicate potential robbing. These observations can give you valuable insights into the health and activity of your bees.
When you open the hive, use your smoker judiciously. A few gentle puffs at the entrance and under the cover are all you need to keep the bees calm. Too much smoke can agitate them further! Move deliberately and smoothly when handling frames – quick movements trigger defensive behavior, while slow, gentle motions keep the bees calm. It’s a bit like practicing Tai Chi – no sudden movements!
- Learning proper hive inspection techniques is essential for both your bees’ well-being and your confidence as a beekeeper.
- During inspections, you’re primarily looking for: the presence of the queen (or eggs as evidence of her recent activity), healthy brood patterns, adequate food stores, signs of pests or disease, and whether the colony needs more space.
- Many beginners feel more comfortable wearing gloves at first, and that’s perfectly fine. As you gain confidence, you might try going without them occasionally, as bare hands provide better dexterity and sensitivity when handling frames.
It’s also crucial to recognize the signs of a healthy brood and a productive queen. A good queen will have a consistent laying pattern, and the brood will be well-fed and developing properly. Keeping an eye out for these signs during your inspection will help you understand the overall health of your colony.
As you gain more experience, you’ll find that inspecting your hive becomes second nature. You’ll develop a sense of what to look for and how to handle your bees with care. Remember, the goal is to inspect your hive in a way that minimizes disruption and stress for both you and your bees.
Feeding Your Bees: When and How
As a beekeeper, understanding when and how to feed your bees can be the difference between a thriving colony and one that struggles. Feeding your bees is sometimes necessary, and knowing how to do it properly can make all the difference in your colony’s success – think of it as supplemental nutrition when Mother Nature isn’t providing enough.
Sugar Syrup Recipes and Feeding Methods
New colonies almost always need feeding to help them establish. They need energy to build comb, care for brood, and create food stores, so plan to feed packages and nucs until they’re well-established. The basic spring and summer feed is 1:1 sugar syrup (equal parts sugar and water by weight) – this thin syrup mimics nectar and stimulates the bees to build comb and raise brood.
For fall feeding, switch to a thicker 2:1 syrup (two parts sugar to one part water) – this helps bees store more concentrated food for winter with less moisture they’ll need to evaporate. There are several feeder types to choose from: entrance feeders (convenient but can promote robbing), division board feeders (fit inside the hive in place of a frame), hive-top feeders (my personal favorite as they hold more syrup and are less likely to cause robbing), or simple jar feeders placed over the inner cover.

Always stop feeding sugar syrup when a strong nectar flow begins – you don’t want sugar syrup stored in your honey supers, as it’s not real honey and will affect the flavor and quality of your harvest. During summer dearth periods when flowers are scarce but temperatures are high, your bees may need supplemental feeding to prevent them from depleting their stores – watch for increased aggression at the hive entrance, which often signals nectar scarcity.
- Feeding your bees is crucial during times of dearth, such as mid-summer when it’s hot and dry or late summer/early fall when most summer-blooming flowers have died off.
- In addition to sugar syrup, colonies sometimes benefit from pollen substitutes (especially in early spring) to provide the protein needed for raising brood when natural pollen sources are limited.
- Keep honey stores close enough to the cluster so that they are covered with bees to prevent robbing.
By understanding the needs of your bees and providing the right nutrition at the right time, you’ll be supporting the health and productivity of your colony. This not only ensures their survival but also enhances their ability to produce honey during the nectar flow.
Managing Pests and Diseases
In the world of beekeeping, staying on top of pests and diseases is essential, and varroa mite management is at the forefront of this effort. As beekeepers, we must be proactive in protecting our bees from these threats to ensure the health and survival of our colonies.
Understanding Varroa Mite Management
The varroa mite is a tiny parasite that feeds on adult bees and developing brood, weakening them and transmitting viruses that can devastate a colony. Monitoring and managing these mites is crucial for colony survival. Regular monitoring is key; using methods like alcohol washes or sugar rolls to check mite levels every 4-6 weeks during the active season will help you catch problems before they become severe.
There are several treatment options available for managing varroa mites, ranging from organic acids like formic and oxalic acid to essential oil-based treatments like thymol. Each has specific application requirements and timing considerations, making it important to choose the right method for your hive.
Beyond varroa, you’ll need to watch for other common issues like small hive beetles, wax moths, and various brood diseases. Early detection through regular inspections is your best defense against these pests. Many new beekeepers underestimate the importance of pest management, but even the strongest, healthiest colonies will eventually succumb to varroa if left untreated in most climate regions.
| Pest/Disease | Monitoring Method | Treatment Options |
|---|---|---|
| Varroa Mites | Alcohol washes, sugar rolls | Formic acid, oxalic acid, thymol |
| Small Hive Beetles | Visual inspections | Beetle traps, oil treatments |
| Wax Moths | Visual inspections, freezing | Freezing, moth traps |
Creating a yearly management plan that includes monitoring and treatment windows will help you stay proactive rather than reactive. Remember, by the time you see visible signs of mite damage, the colony is already in serious trouble. Integrated pest management approaches that combine mechanical methods, cultural practices, and treatments when necessary offer the most sustainable approach to keeping healthy colonies.
Seasonal Beekeeping Tasks
To keep our bees thriving, we must attune ourselves to the rhythm of the seasons and adjust our beekeeping practices accordingly. Beekeeping follows the natural cycle of the year, with each season presenting its own set of challenges and opportunities for the beekeeper. Understanding these seasonal changes is crucial for maintaining healthy and productive bee colonies.
Spring Management
Spring is a time of renewal and growth in the beeyard. As temperatures rise and days get longer, bees begin to stir from their winter slumber. The queen increases her egg-laying, and the colony starts to expand rapidly. Effective spring management is critical to ensure the colony has enough food, space, and is free from diseases. This includes checking for adequate honey stores, preventing swarming by giving the colony room to expand, and possibly splitting strong colonies to increase the apiary.
During spring, it’s also essential to inspect the hive regularly to monitor the colony’s health and growth. Beekeepers should be on the lookout for signs of disease or pests and take corrective action if necessary. As the season progresses and nectar flows become more reliable, the bees will start to produce new honey, signaling a successful transition into the new season.
Key Spring Tasks
- Inspecting colonies for signs of disease or pests
- Ensuring adequate food stores and supplementing if necessary
- Giving colonies room to expand to prevent swarming
- Splitting strong colonies to increase the apiary
As we move into summer, the main honey flow begins in most regions. This is a critical period for beekeepers, as they need to stay ahead of the bees by adding honey supers before they’re needed and keeping a close eye on pest populations, which also tend to build up during this time.
In summer, beekeepers must be vigilant about dearth periods when flowers may be scarce. During these times, bees can become more defensive, and supplemental feeding may be necessary to prevent them from depleting their honey stores.
As summer gives way to fall, beekeepers begin preparing for winter. This involves treating for varroa mites, ensuring the bees have enough honey stores (about 60-80 pounds for most regions), combining weak colonies, and reducing entrances to prevent robbing.
During winter, beekeeping tasks are less frequent but still important. Periodic checks on warm days (above 50°F) are necessary to ensure the cluster has access to honey stores. Beekeepers should also clear dead bees from entrances and protect the hive from winter winds and moisture.
It’s worth noting that the timing of these seasonal activities can vary significantly by region. Beekeepers in different parts of the country, such as Florida versus Minnesota, will have very different schedules. Connecting with local beekeeping associations can provide invaluable region-specific guidance.
Harvesting Honey: From Hive to Jar

The moment of truth arrives when your bees have worked tirelessly to fill the honey supers, and it’s time to harvest that liquid gold! Harvesting honey is one of the most rewarding moments in beekeeping, and with the right techniques and equipment, you can enjoy the fruits of your labor.
Before we dive into the process, it’s essential to understand the importance of timing. You’ll want to wait until the frames are at least 80% capped with wax, indicating that the honey has been properly cured to the right moisture content (about 18% or less) to prevent fermentation.
When and How to Harvest Honey
Timing your harvest is crucial. Generally, honey is ready to be harvested in late summer or early fall, depending on your location and the nectar flow. To determine if the honey is ready, inspect your frames regularly. When you find that the supers are full and the honeycomb is capped, it’s time to start preparing for harvest.
To remove bees from the honey super, you can use a fume board with a bee repellent like Bee-Go. This product is applied to a pad on the fume board, which is then placed on top of the hive. The bees don’t like the odor and will move down into the hive, leaving the honey super bee-free.
- Harvesting your first batch of honey is one of the most rewarding moments in beekeeping – there’s nothing quite like tasting that liquid gold that your bees have worked so hard to create!
- Timing your harvest is important – wait until frames are at least 80% capped with wax, which indicates the honey has been properly cured to the right moisture content (about 18% or less) to prevent fermentation.
- Before harvesting, you’ll need to remove bees from the honey supers – bee escapes, fume boards with bee repellent, or the “shake and brush” method are all options, with fume boards being the quickest for most hobbyists.
- Once your frames are bee-free, bring them to your extraction area quickly to prevent robbing – a warm room makes extraction easier as honey flows more freely at higher temperatures.
- You’ll need to remove the wax cappings from the frames – this can be done with an uncapping knife (heated or cold), an uncapping fork, or even an electric uncapping plane for those with more equipment.
- For small-scale beekeepers, a hand-cranked or electric extractor spins the frames, using centrifugal force to pull honey from the comb while leaving the wax structure intact to be returned to the hive.
- After extraction, honey should be strained (not filtered) through a coarse strainer to remove bits of wax and bee parts while preserving the beneficial pollen, enzymes, and other natural components.
- Don’t forget about the beeswax – those cappings you removed are pure, valuable wax that can be melted, filtered, and used for candles, cosmetics, or sold to crafters (nothing goes to waste in beekeeping!).
For beginners, investing in the right honey extraction equipment is crucial. A manual or electric extractor is a worthwhile investment, as it makes the process much easier and more efficient. Additionally, an uncapping knife or fork is necessary for removing the wax cappings from the frames.
After you’ve extracted the honey, you’ll need to bottle it. Make sure to use clean, sterilized bottles and to label them clearly. You can also consider using a honey gate or bottling tank to make the process easier and less messy.
Harvesting honey is a process that requires patience, but with the right equipment and techniques, it can be a truly rewarding experience. Enjoy the fruits of your labor and share your honey with friends and family!
Common Beginner Mistakes and How to Avoid Them
As a beginner beekeeper, it’s easy to get caught up in the excitement, but it’s crucial to be aware of the common mistakes that can impact your colony’s health. We’ve all been there – making mistakes, learning from them, and moving forward. Let’s explore some of the most common errors new beekeepers make and how you can avoid them.
Inspection Errors
Inspecting your bees is a crucial part of beekeeping, but it’s easy to get it wrong. One of the biggest mistakes new beekeepers make is inspecting their hives too frequently. While your enthusiasm is wonderful, opening the hive more than once a week disrupts the colony and can set back their progress. It’s essential to give your bees time to settle and establish their routine.
When you do inspect, make sure to use your smoker correctly. Many beginners fail to use enough smoke to effectively calm the bees, or they use too much, agitating them further. The smoke should be cool and white, not hot and billowing. Remember, the goal is to calm the bees, not to overwhelm them.

Another common mistake during inspections is misidentifying the queen or failing to find her. This can cause unnecessary stress for both you and the bees. Instead of focusing solely on spotting the queen, look for signs of her presence, such as fresh eggs. Seeing tiny white specks standing upright in cells is evidence of a queen’s presence, even if you don’t spot her directly.
- Wearing dark clothing, strong perfumes, or scented products when working with bees can trigger defensive behavior. Stick to light colors and unscented products for more pleasant inspections.
- New beekeepers often struggle with frame handling, crushing bees when removing or replacing frames. This creates alarm pheromone that can escalate defensive behavior throughout the inspection. Take your time and move smoothly, like you’re doing Tai Chi.
- Many beginners don’t recognize the signs of a honey-bound hive or fail to add supers in time during a strong nectar flow. Keep an eye on your hive’s honey stores and be prepared to add more space as needed.
Perhaps the most critical mistake is neglecting varroa monitoring and treatment. Even the strongest colonies will eventually collapse under heavy mite pressure. Make sure to check for varroa regularly and take action when necessary.
Finally, be mindful of your honey harvest. Harvesting too much honey the first year can leave your colony without adequate winter stores. Remember, your first priority is the bees’ survival, and any honey you get to enjoy is a bonus!
By being aware of these common beginner mistakes, you can take steps to avoid them and create a healthy, thriving environment for your bees. Happy beekeeping!
Conclusion: Your Journey into Beekeeping
With the basics covered, it’s time to take the leap into beekeeping, and we’re here to support you every step of the way! As you begin this wonderful journey, remember that every experienced beekeeper started exactly where you are now. You’re about to join a community that’s as passionate about bees as you are!
Beekeeping is both a science and an art. You’ll learn something new every season, and your bees will be your most important teachers if you pay attention to what they’re showing you. Don’t be discouraged by setbacks; even seasoned beekeepers lose colonies sometimes. Each challenge is an opportunity to deepen your understanding and improve your skills.
To make the most of your beekeeping journey, connect with your local beekeeping community through associations, classes, and mentorship programs. The support and shared knowledge of fellow beekeepers are invaluable, especially in your first few years. Keeping good records of your hive inspections and management decisions will also become a treasure trove of information as you identify patterns and improve your practices over time.
As your confidence grows, consider expanding your apiary gradually. Managing multiple colonies provides valuable comparison and can actually make beekeeping easier as you can share resources between hives when needed. And remember, honey isn’t the only reward; the joy of working with these fascinating creatures, the meditative quality of hive inspections, and your contribution to pollination and biodiversity are equally valuable benefits.
Most importantly, enjoy the journey! Beekeeping connects us to the natural world in a unique and profound way. There’s nothing quite like the satisfaction of watching your colonies thrive under your care, knowing you’re part of an ancient tradition that stretches back thousands of years, and savoring the sweetness of your honey harvest.
Leave a Reply