Looking for a creative way to add privacy to your patio or small outdoor area? Imagine a solution that’s both functional and beautiful, without requiring permanent changes. Inspired by the innovative designs of California restaurant parklets, this project combines vertical gardening with a stylish privacy screen.
This beginner-friendly idea uses basic woodworking skills to create a freestanding or wall-mounted structure. It’s perfect for small spaces, offering dual functionality as a plant support and decorative screen. Plus, it’s adaptable to patios, porches, or urban gardens, making it a versatile choice for any home.
Whether you’re dealing with HOA restrictions or simply want a temporary solution, this project is cost-effective and easy to set up. Ready to transform your outdoor space? Let’s dive in!
Key Takeaways
- Combine vertical gardening with functional privacy solutions.
- Inspired by real-world designs like California restaurant parklets.
- Perfect for small spaces, patios, or urban gardens.
- Beginner-friendly with basic woodworking skills required.
- Cost-effective alternative to permanent fencing.
Introduction to DIY Garden Trellis with Planter Boxes
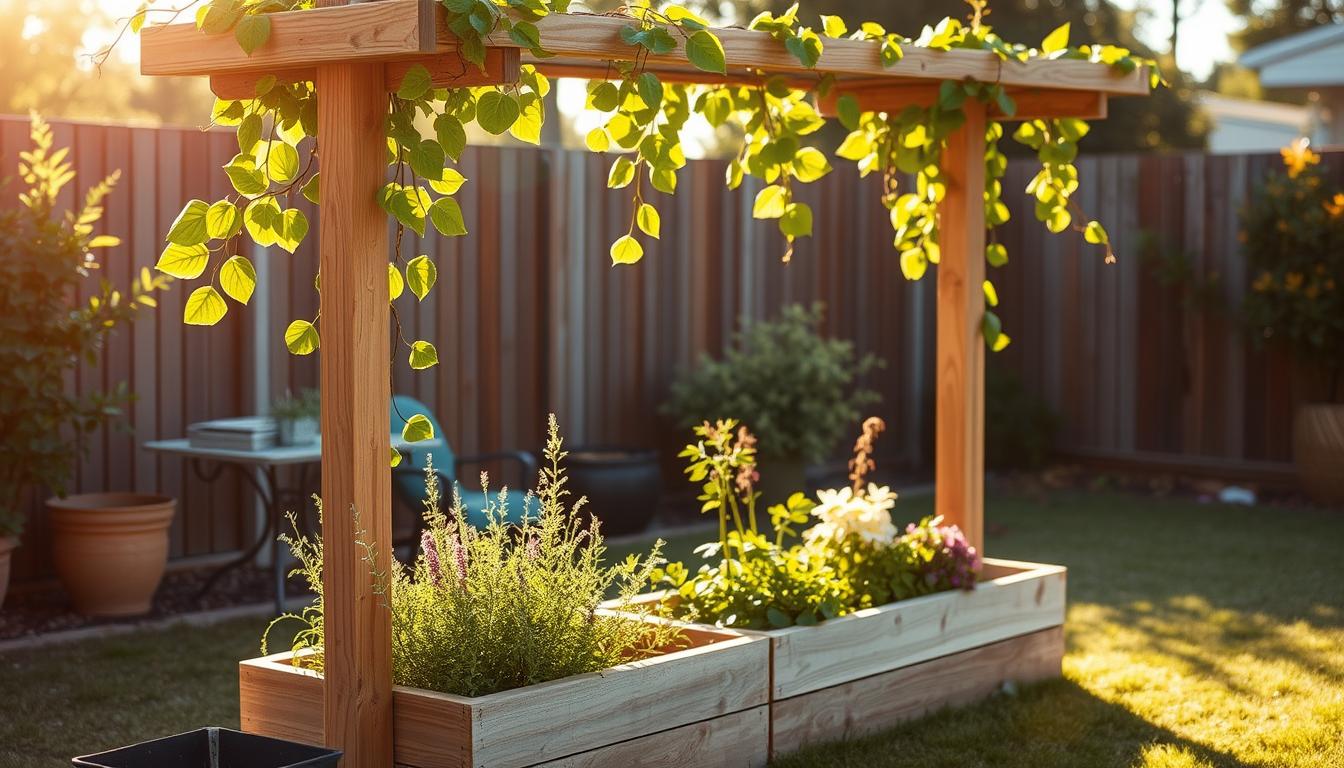
Need a stylish way to block unwanted views without permanent changes? When I faced HOA restrictions at my rental property, I discovered a creative solution: a mobile privacy screen using planters and trellises. This setup not only added greenery but also transformed my patio into a cozy retreat.
Using four planters with 5-foot trellises, I created a functional barrier. I cut 6-foot boards to 5 feet and used 2¼-inch lattice strips for the trellis. A sleek black stain gave it a modern look. This project cost between $150 and $200 per unit, much cheaper than professional landscaping.
Vertical gardening offers many benefits. It maximizes small spaces, improves air circulation, and supports climbing plants like Mandevilla and morning glories. Unlike permanent fences, this system is movable and adaptable. You can adjust the height and width to fit your space.
For year-round privacy, consider climbing evergreens. Annuals like morning glories add seasonal color. To prevent top-heavy planters from tipping, secure them against strong winds. This project is beginner-friendly and requires basic woodworking skills.
Ready to get started? In the next section, we’ll cover the materials and tools you’ll need to build your own trellis planter system.
Materials and Tools You’ll Need
Ready to build something practical for your space? Gathering the right materials and tools is the first step. This project requires basic supplies and equipment, most of which are easy to find at your local hardware store. Below, we’ve broken down everything you’ll need, including alternatives to fit your budget and preferences.

Materials
For this project, you’ll need the following materials:
- Wood: Two 1”x12”x6’ boards (pine or cedar). Cedar is more durable but pricier.
- Lattice: One 2’x8’ panel. Choose between wood or vinyl for longevity.
- Screws: One box each of 2” and 1¼” wood screws. Galvanized screws are best for outdoor use.
- Stain: Oil-based stain for weather protection. Water-based options are also available.
If you’re on a budget, consider upcycled pallet wood or fence pickets. These alternatives can reduce costs while maintaining functionality.
Tools
Here’s a list of tools to make the job easier:
- Miter Saw: For precise cuts. A circular saw works as a substitute.
- Drill: Essential for assembling the structure.
- Staple Gun: Useful for attaching fabric liners to planters.
- Safety Gear: Gloves, goggles, and a dust mask for protection.
| Item | Recommended | Alternative |
|---|---|---|
| Wood | Cedar | Pine or pallet wood |
| Lattice | Vinyl | Wood |
| Screws | Galvanized | Coated |
| Stain | Oil-based | Water-based |
Optional upgrades include decorative top caps or planter wheels for added mobility. With these materials and tools, you’re ready to start building your project!
Step-by-Step Guide to Building Your DIY Garden Trellis with Planter Boxes
Ready to create a functional and stylish outdoor feature? This step-by-step guide will walk you through the process of building a versatile structure that combines beauty and practicality. Let’s get started!
Step 1: Cutting the Wood
Begin by preparing your materials. Use a miter saw to cut the boards to the required sizes: 48” for the front, 24” for the sides, and 60” for the trellis supports. Double-check measurements to ensure accuracy.
Pro Tip: Batch-cutting multiple units saves time and ensures consistency. Always sand sharp edges before assembly for safety.
Step 2: Assembling the Planter Box
Next, assemble the box using 2” screws for structural joints. Reinforce the corners with 2×2 supports for added stability. This step is crucial for creating a durable raised bed.
Common Mistake: Avoid using screws that are too short, as they may not hold the structure securely.
Step 3: Attaching the Trellis
Attach the lattice to the support posts using 1¼” screws. Pre-drill holes in the lattice to prevent splitting. You can choose between horizontal or vertical orientation based on your design preference.
Pro Tip: Use rafter clips for additional stability when attaching 4×4 posts.

Step 4: Staining and Finishing
Finally, apply an oil-based stain to protect the wood from weather damage. Use a brush or spray for even coverage. Consider adding decorative top caps or hanging hooks for customization.
Pro Tip: Allow the stain to dry completely before placing plants in the planter box.
With these steps, you’ll have a functional and stylish outdoor feature that enhances your space. Happy building!
Conclusion
Transform your outdoor area into a lush, private retreat with this simple yet effective project. Combining gardening with a functional privacy solution, it’s perfect for small spaces. Whether you’re growing vegetables, flowers, or climbing plants, this setup maximizes your space beautifully.
This project is cost-effective, customizable, and easy to move. Share your results on social media and inspire others! Consider expanding your setup with matching patio furniture or adding a raised beds system for more planting options.
For maintenance, seasonally stain the wood and train your plants for optimal growth. Check the structure annually to ensure safety. Join online gardening communities for tips and inspiration. Don’t forget to tag your projects with #DIYGardenTrellis!
Ready to start? Download free printable plans and watch your outdoor space thrive. Happy planting!