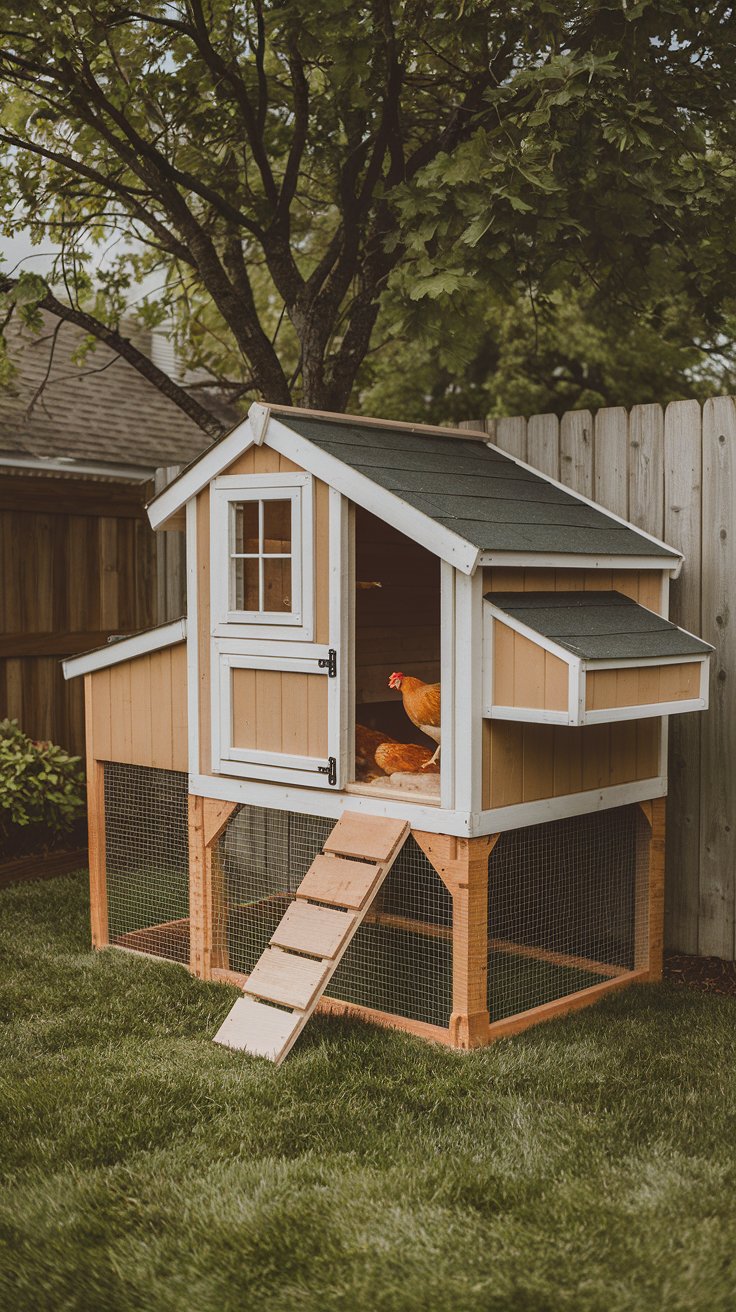
Imagine a compact, rustic chicken coop nestled in your backyard, built with care and ingenuity using simple materials. The coop is a basic rectangular structure, 4 feet wide by 6 feet long, elevated 18 inches off the ground to keep predators out. The roof gently slopes to one side, ensuring rainwater runs off, and the coop is ventilated but snug, offering chickens a safe and dry home.
Thank you for reading this post, don’t forget to subscribe!The frame is constructed from salvaged or affordable wood (like pallets or pressure-treated 2x4s), and the walls are covered with plywood, painted or sealed for weather resistance. A small, hinged door allows you to access the interior for cleaning, and a chicken-sized entrance ramp provides an easy path for your birds to enter and exit. The floor is a solid piece of plywood covered with a removable tray for easy cleaning.
The coop features a secure run made from galvanized hardware cloth to keep out raccoons, foxes, and snakes. The run is attached to the coop and surrounded by a buried apron of mesh to prevent predators from digging underneath. Inside, wooden roosting bars and nesting boxes made from recycled crates provide the chickens with comfortable resting and laying spots. The entire structure is sturdy and designed for long-term durability, offering both functionality and charm.

Here’s a detailed guide to building a sturdy, predator-proof chicken coop, along with a precise materials and tools list. The coop design is beginner-friendly, cost-effective, and offers clear steps to ensure success.
Detailed Coop Design
Dimensions:
- Coop: 4 feet wide, 6 feet long, 4 feet tall at the front, sloping to 3 feet at the back.
- Run: 6 feet wide, 10 feet long, 4 feet tall.
The coop is elevated 18 inches off the ground and features a slanted roof for rain runoff, ventilation holes, secure doors, and a hardware cloth-covered run.
Materials List
Lumber (use untreated wood for inside, pressure-treated for base):
- 2×4 Boards (Pressure Treated):
- 8-foot boards: 12 pieces for the base frame, legs, roof supports, and wall framing.
- Plywood Sheets (for walls, roof, and floor):
- 4×8-foot sheets (1/2-inch thickness): 4 sheets.
- 1 for the floor.
- 2 for walls (cut to fit dimensions).
- 1 for the roof (or use corrugated roofing material instead).
- 4×8-foot sheets (1/2-inch thickness): 4 sheets.
Hardware and Fasteners:
- Galvanized Hardware Cloth: 25 feet of 3-foot-wide, 1/2-inch mesh for the run, vents, and buried apron.
- Screws: 2-inch wood screws (box of 100) and 1-inch screws (box of 50).
- Hinges: 4 heavy-duty hinges (for coop door and nesting box lid).
- Latch Locks: 3 predator-proof latches (coop door, nesting box lid, and egg door).
- Roofing Material: 6×8 feet corrugated metal or asphalt shingles (or use a waterproof tarp as a budget option).
Interior Features:
- Roosting Bars: 2×4 boards, 4 feet long (2 pieces).
- Nesting Boxes: 3 wooden crates or milk crates.
- Removable Tray: A shallow plastic tray or repurposed sheet metal cut to size for easy cleaning.
Tool List
- Measuring tape
- Pencil and square (for precise cuts)
- Circular saw or handsaw
- Drill and drill bits
- Staple gun (for attaching hardware cloth)
- Hammer
- Level (to ensure stability)
- Paintbrush (for waterproofing)
Building Instructions
Step 1: Build the Base
- Cut 2 of the 8-foot 2x4s into 6-foot and 4-foot lengths to make a rectangular frame for the coop base.
- Screw the pieces together to form a rectangle.
- Attach 4 vertical 2x4s, 18 inches long, to the corners of the base frame to serve as legs, elevating the coop.
Step 2: Construct the Coop Frame
- Build the wall frames:
- Use 2x4s to create 4-foot-tall front wall and 3-foot-tall back wall frames. The slanted roof requires diagonal cuts for sidewall supports.
- Assemble the walls:
- Attach 2×4 crossbars to the side walls for stability, then attach the front and back wall frames to the base.
Step 3: Add Walls and Floor
- Cut plywood:
- Floor: 4×6 feet (attach this to the base frame).
- Walls: Cut to fit the coop dimensions (4 feet tall for the front, sloping to 3 feet at the back).
- Drill ventilation holes near the roofline on all sides (cover with hardware cloth for predator protection).
- Screw plywood to the frame, leaving openings for:
- A human-access door (2×3 feet) on one side.
- A chicken door (12×12 inches) near the floor.
Step 4: Install the Roof
- Attach 2×4 supports to create a slanted roof frame.
- Attach plywood or corrugated metal for the roof. Overhang the edges by 6 inches to protect from rain.
Step 5: Build the Run
- Construct a frame for the run using 2x4s:
- Base: 6×10 feet.
- Height: 4 feet.
- Cover the frame with hardware cloth, using a staple gun to secure it tightly.
- Bury an 8-inch hardware cloth “apron” around the run to deter digging predators.
Step 6: Interior Setup
- Install roosting bars inside the coop, 18 inches above the floor.
- Place nesting boxes along one wall, secure them to prevent tipping.
- Slide in the removable tray beneath the roosts for easy cleaning.
Step 7: Secure Doors and Finish
- Attach hinged doors with latches:
- Main door for cleaning and access.
- Egg collection door near nesting boxes.
- Paint or seal the coop for weatherproofing.
Estimated Costs
- Lumber: $80–$100
- Plywood: $60–$80
- Hardware cloth: $40–$50
- Hinges, latches, screws: $30–$50
- Roofing material: $40–$60
Total Cost: $250–$350 (depending on material choices and local prices).
This coop design balances affordability, sturdiness, and predator protection while being achievable for someone with basic tools and DIY experience!


